The angular force needed to twist something is called torque. For example, force needed to rotate the steering wheel as you around a corner, or the force supplied by a helicopter engine to rotate its propeller are examples of torques. Torque testing includes determining the quantity of torque being supplied to an object. Using the proper torque is a vital part of a consistent bolted joint.
Why is Torque Testing Needed?
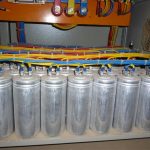
Building a big, complicated circuit often includes hundreds of fasteners, mainly bolts or screws that are stiffened by a torque driver. Generally, tightening the fasteners excessively can lead to exceeding tolerances of the fastener. For example, you may end up removing some of the threads on a screw, making it defective. If the forces operating on the metal surpass its plastic limit, it may end up expanding and not returning to its initial dimensions, which means that it will not keep the structure in shape.
Thus fasteners should be tested to check the joint has been tightened to the correct torque requirements. Verification makes sure that the quality requirements are fulfilled. By calculating and examining the torque characteristics in such applications it is achievable to precisely find out not only the quality of the circuit, but also the main reason of a broad variety of flaws.
Loose or weak connections may function reasonably for a time period, but sooner or later they will undergo thermal runaway that will cause high temperatures causing equipment impairment and, sometimes fires. There have seen numerous occurrences of failures and fires that were proved to be triggered by loose connections. For many electricians, the idea of torquing terminations is a recent concept, but the benefits are clear: safer installations.
One should not look loose connections alone but over tightened or stripped connections should also be noticed. A stripped connection would not be clear by visual inspection alone. You may notice a damaged setscrew or a skewed setscrew which indicates stripped connection. Both loose and overly tightened connections generates a danger of breakdown.
What is Done During Torque Testing?
All the connections must be tightened according to the standards using correct equipment. The connections in the field generally involves bolts, connectors and terminals involving the following items:
- Breakers
- Neutral/ground bars
- Mechanical, insulated, piercing lug
- Bolts on compression-type connectors
- Mechanical lug & Lay-in lugs
- MSB bussing, bolt-in breakers
Although factory connections in the gear must be tightened up to the correct value when they reach at the job site, there may be signs of connections becoming undone clear to the inspector. If loose connections are identified, it should be tightened again to a suitable torque value.
Best Practices to be Followed While Doing Torque Testing
When testing connections are not loosened, a value that is ten percent less is a decent value according to a hit and miss assumption to be sure that you do not fasten the connection too much. 10% lower than the torque specifications, particularly in old tools, is a good place to begin. The stated torque value must never be surpassed. The theory of “more torque is better” is false. Applying a higher torque value than stated may lead to damage to the connection or equipment. Torquing must certainly not be done on energized equipment; if it must be performed, make sure that appropriate PPE is used. Before energizing the facility, electrician must express that he or she has appropriately torqued the terminations. Loose electrical connections are one of the leading causes for electrical failures. Tools are used to precisely apply a specific torque to a fastener.
The torque values must be found out as soon as the bolts are fastened and in advance to product painting or heating. This is since precise readings depend on friction existing below the nut surfaces and in the bolt threads. The torque value reading will be incorrect if the bolt is unprotected from varied environmental surroundings or is placed to sit for a long time. You can expect as much as a 21% discrepancy if a bolt is left to stand for around 48 hours.
How is Torque Testing Performed?
Every bolt has a torque scheme or value that makes sure hidden failures are eradicated and that the protection, consistency and characteristic of your product are not compromised. Once your product has been safeguarded according to the stated torque, the torque value on the bolt should tested for precision. A bolt that is not properly connected according to the torque value suggested by the manufacturer can cause:
- Unfastening and shedding due to non-stop vibration
- Coming off of thread on the fastener (this is the case with excessive torque being applied)
The ISO 9001 quality regulation sets out the torque values and gauges awaited and necessary of various bolts and other fasteners presented on the market. Regardless of the type of bolts you are using (carriage bolts, hex head bolts, lag bolts or tap bolts) the torque value must be checked and verified in advance to the quality approval of the product.
There are 3 Methods Performed in a Torque Test Sequence
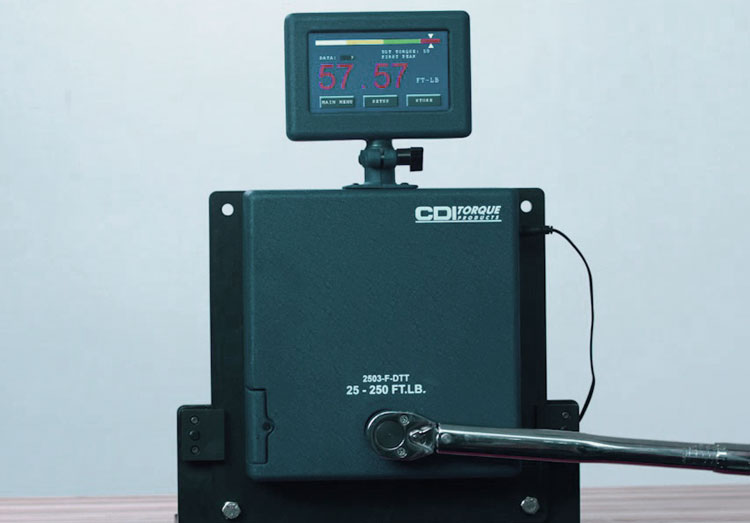
The Movement Check
In this a wrench that has a torque meter on it is used (Generally, these can be rented or bought cheaply online). Using this technique to find out the torque in an installed fastener includes turning the fastener in a clockwise route, as you would when fastening it. The aim is to attempt to make it move a little, and then record the torque reading when this first happens. It’s vital that you don’t move the fastener too much, mainly if it’s too tight and is within its boundaries. After fastening the bolt, utilise a torque measuring device to mark off the tightened bolt and the workpiece. Apply extra force in the tightening direction until movement is observed. Recording the reading will indicate the remaining torque applied to the joint in the beginning.
The Loosening Check
This functions similar as the movement check except an extra force is employed to the fastened bolt in the loosening direction. At the exact position that the bolt breaks loose, note the reading and mark it off. The amount of torque necessary to loosen the bolt is the torque applied to the bolt in the beginning.
The Marking Check
This method is more or less one-sided, but it’s still valid. After fastening the bolt, mark the bolt surface of the workpiece. Then loosen the bolt. Tighten it again until the markings re-align. The torque necessary to resume the bolt to its initial position is the torque value of the bolt. One of the main plus point of utilising this test is the fact that it is easy to do. You can utilise it for most kinds of fasteners, even Nylon screws.
Benefits of Torque Testing
- Making sure correct functioning of components
- Making sure the reliability and security of products
- Dropping material expense and attaining lean manufacturing objectives
- Fulfilling industry standards