What is Cable Testing. How is Cable Testing Done | Carelabz.com

Cabling is an expensive business and must be treated carefully. The expenditure of substitution once the routes are all concealed is bigger. The fault is not always visible like crushing, bending or kinking. Make sure that your cabling installer have made provision to protect installed cabling from other worker’s actions. This is substantially less costly than changing cabling in the future. If cable routes are guarded with no way of opening them between termination and installation, it is ideal to terminate the cables for the time being, so they can be tested before the routes are protected.
Why is Cable Testing Needed?Cable testing is made to drop down testing times. This is done to check the:
- Cable conformity
- Cabling quality
- Cable functionality
Many times, a fault in a cable can be seen well before it becomes an actual problem. A visual inspection of all the cables in your facility is a great way to find trouble before it causes you a downtime. We look for corrosion on the copper, cracks in the insulation, moisture on the cables and many other indicators of damage to the cables.
Cable faults cost money and create disruption, so there is an enormous demand for cable test techniques to ensure cables and joints are in good condition, and to allow cable faults to be located rapidly.
Cable testing to both predict and then deal with faults is a vital concern for all those involved with the distribution of electricity. A wide range of test techniques and test equipment are available to allow this concern to be effectively addressed, but cable testing can, nevertheless, be a challenging task.
For this reason, a resource that’s as important as the test equipment itself is access to expertise that will help with selecting the best equipment for the job, and using it in such a way that it delivers the best results
What is Done During Cable Testing?
Given below are the tests and inspections that must be done before energizing low voltage cable rated 600V or below.
- Compare cable data with drawings and specifications. Pay attention to the number of sets, the cable size, routing, and insulation ratings. Note these items on the test sheet.
- Check uncovered parts of cable for material damage. Look at the condition of the cable jacket and insulation of exposed sections. Verify that the connection points match what is shown on the project single-line diagram.
- Check bolted electrical connections for high resistance with the use of a calibrated torque-wrench, low-resistance ohmmeter or thermographic survey.
- When using a calibrated torque wrench, reference ANSI/NETA Table 100.12 US Standard Fasteners, Bolt Torque Values for Electrical Connections.
- The values of similar bolted connections must be compared and check which value shift by more than fifty percent of the smallest value in the case where a low resistance ohmmeter is utilized.
- Look at the condition of the exposed cable jacket and insulation when performing a visual inspection on low voltage wire and cable.
- Inspect compression-applied connections by verifying that the connector is properly rated for the installed cable size and has the proper indentations.
- Perform an insulation-resistance test on each conductor with respect to ground and adjacent conductors. Test period must be for 1 minute using a voltage according to manufacturer’s published data.
- If no literature from the manufacturer is available, apply 500 volts dc for 300-volt rated cable and 1000 volts dc for 600-volt rated cable. Insulation-resistance values must be according to the manufacturer’s published data. If no data from the manufacturer exists, the values should be no less than 100 megohms. Perform continuity tests to ensure correct cable connection and phasing.
- Verify uniform resistance of parallel conductors using a low-resistance ohmmeter. Measure the resistance of each cable individually and investigate deviations in resistance between parallel conductors.
Given below are various kinds of tests that are conducted on cables:
The following tests are type test of electrical power cable.
- Persulphate test (for copper)
- Annealing test (for copper)
- Tensile test (for Aluminium)
- Wrapping test (for Aluminium)
- Conductor resistance test (for all)
- Test for thickness of insulation (for all)
- Measurement of overall diameter (where specified) (for all)
Physical tests for Insulation and Sheath
- Tensile strength and elongation at break
- Ageing in air oven
- Ageing in air bomb
- Ageing in oxygen bomb
- Hot set
- Oil resistance
- Tear resistance
- Insulation resistance
- High voltage (water immersion) test
- Flammability test (only for SE-3, SE-4)
- Water abortion test (for insulation)
Acceptance test: The following shall constitute acceptance test:
- Annealing test (for copper)
- Tensile test (for Aluminium)
- Wrapping test (for Aluminium)
- Conductor resistance test
- Test for thickness of insulation and sheath and overall diameter
- Tensile strength and Elongation at break of insulation and heath
- Hot set test for insulation and sheath
- High voltage test
- Insulation resistance test
Routine test: The following shall constitute the routine test.
- Conductor resistance test
- High voltage test
- Insulation resistance test
How is Cable Testing Performed?Given below are the tests done while cable testing is done:
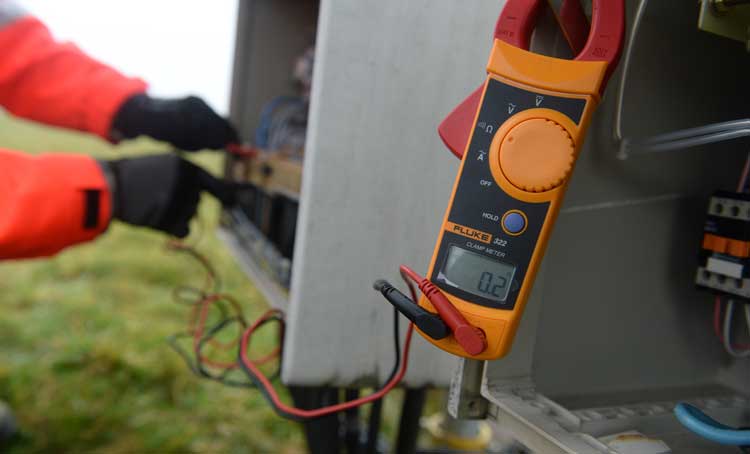
Continuity Test
- The continuity test (also called low resistance measurement) is measuring the low resistance of cables, from 1 mΩ to 250 Ω.
- The continuity test can be made in 2 or 4 wires according to the resistance to be measured: 2 wires for resistances > 1 Ω, and 4 wires for resistances < 1 Ω.
- The continuity test in 2 wires mode consists in injecting a programmable current and measuring voltage and current at the terminals of the resistance to be tested. Ohm’s law will give the exact value.
- In four wires mode or Kelvin method continuity test divide the switching matrix into 2 internal buses
- directing the test current
- conveying the voltage of the terminals of the element under measurement.
Even-addressed points are allocated to the SENSE of the measurement, odd points to injection of the current. This layout is doable all the way through the switching matrix and can be joint with two wire continuity tests.
- To give you an example, the continuity test in 4 wires mode lets you carry out measurements on wires of 50 cm length and 5/10 mm cross-section (between 7 and 13 mW) with good resolution.
Insulation Test:
- The insulation test also known as high resistance test is always made DC. The insulation test is combined with a short-circuit test and high voltage test in DC.
- The insulation test combines several functions.
- The insulation test can perform:
- determining insulation resistances from fifty kilo ohm to two thousand mega ohm at high voltage i.e. from 20V to 2000V.
- measurement of dielectric strength and detection of short circuits.
- The insulation test proceeds as follows:
- An initial test at low voltage (continuity measurement) to detect any short circuit (1). If a short circuit is found, the insulation test stops (the message SHORT CIRCUIT appears in the error list).
- If there is no short circuit, the high voltage is applied. During the programmable rise time (2), if breakdown occurs, the voltage is displayed and the test stops (the breakdown voltage is given in the error list).
- If no breakdown occurs and if the voltage does not reach the required value (±10%), the message U<Uprog appears in the error list.
- Next, the voltage is applied for the duration of the programmed application time (3). If breakdown occurs during this period, the moment when the fault appears is displayed in the error list and the test stops.
- Lastly, if all goes well, at the end of the application time (4), the insulation test is made, and the insulation resistance measured. The tester will add a measurement time as a function of the range requested. The measurement time varies from 20ms to 240ms according to range.
- To end the sequence, the tester reduces the high voltage and then discharges the unit tested to an earth resistance (total time 20ms).
- This procedure is identical at the end of every measurement of insulation.
- The dielectric strength test detects any sudden variation in the increase of the test current outside the programmed limit.
- The short circuit test or high voltage test can be programmed out of the test.
Phasing Test:
- The correct phasing of all LV circuits shall be checked at all positions where the LV cables are terminated into fuse bases and where any LV cable is run from point to point.
- This test shall be performed with an instrument designed for the purpose. Mains frequency voltage of 240 Volts is not acceptable for this test.
- The neutral conductor shall be connected to the earth stake for this test.
Earth Resistance Test:
- In any overhead or underground network, the earth resistance at any point along the length of a LV feeder is to have a maximum resistance of 10 ohms prior to connection to the existing network.
- In any overhead or underground network, the overall resistance to earth Shall be less than 1 ohm prior to connection to the existing network.
High Voltage Test:
- The high voltage test (also called dielectric strength test or hipot test) can be made in AC or DC. If the high voltage test is made in DC, it is then combined with insulation; if the high voltage test is made in AC, it is then, this is then, more stressful for the sample and made according to the sketch below.
- Measurement of high voltage test under alternating current is performed using an alternating voltage (50Hz) adjustable to an effective 50V to 1,500V. As is the case with direct current, the high voltage test detects any sudden rise of current up to a programmed threshold.
- The short circuit test is maintained by default. The rise time is more than 500 ms and the application time at least one period.
- Warning: The high voltage test under alternating current is penalized by the capacitive value of the tested equipment. It must be remembered that the generator power is limited to 5 mA.
Benefits of Cable Testing
- Product warranties are limited
- Testing is less expensive than repair
- Periodic testing will futureproof the infrastructure
Get Started
Need expert support?
Carelabs delivers arc flash studies, power system analysis, and DEWA compliance services across the UAE.