The resistance of an earth electrode is related to the resistivity of the soil in which it is placed and driven, and thus soil resistivity calculations and measurements is a crucial aspect when designing earthing installations.
The property of resistivity can be defined for any material and is done so by the American Society for Testing and Materials (ASTM), which publishes standards for testing and measurement. When applied to soil, resistivity is an indication of a given soil’s ability to carry electric current.
The flow of electricity in the soil is largely electrolytic, determined by the transport of ions dissolved in moisture. An awareness of soil resistivity at the determined location and how it varies with various factors such as temperature, depth, moisture content etc. gives us an understanding of how the wanted earth resistance value should be obtained and retained over the lifespan of the installation with least cost and trouble.
Why Testing the Soil Resistivity Important?
A major aim of grounding system is to set up a shared reference potential for the building structure, power supply system, electrical conduits, plant steelwork, and the instrumentation system. To achieve this objective, a suitable low resistance connection to earth is desirable. However, this is often difficult to achieve and depends on a number of factors:
- Soil resistivity
- Stratification
- Size and type of electrode used
- Deepness to which the electrode is covered
- Dampness and chemical composition of the soil
The purposes of soil resistivity testing is:
- To obtain a set of measurements which may be interpreted to yield an equivalent model for the electrical performance of the earth, as seen by the particular earthing system.
- Geophysical surveys are performed using these values as an assistance in finding depth to bedrock, core locations and other geological phenomena.
- The degree of corrosion in underground pipelines is determined. A drop in resistivity is proportional to an indent in corrosion in subversive pipelines.
Soil resistivity influences the plan of an earthing system absolutely and is the major factor that decides the resistance to earth of a grounding system. Thus before designing and installing a new grounding system, the determined location should be tested to find out the soil’s resistivity.
| Type of Soil or Water | Typical Resistivity Ωm | Usual Limit Ωm |
| Sea water | 2 | 0.1 to 10 |
| Clay | 40 | 8 to 70 |
| Ground well & spring water | 50 | 10 to 150 |
| Clay & sand mixtures | 100 | 4 to 300 |
| Shale, slates, sandstone etc. | 120 | 10 to 100 |
| Peat, loam & mud | 150 | 5 to 250 |
| Lake & brook water | 250 | 100 to 400 |
| Sand | 2000 | 200 to 3000 |
| Moraine gravel | 3000 | 40 to 10000 |
| Ridge gravel | 15000 | 3000 to 30000 |
| Solid granite | 25000 | 10000 to 50000 |
| Ice | 100000 | 10000 to 100000 |
What is Done During the Testing of Soil Resistivity?
Soil Resistivity varies widely with following factors:
- Type of earth
- Stratification
- Moisture content; resistivity may fall rapidly as the moisture content is increased
- Temperature
- Chemical composition and concentration of dissolved salt.
- Presence of metal and concrete pipes, tanks, large slabs.
- Topography
The results, if adequate investigation is not made prior to the test, or the test is not correctly undertaken, may be incorrect or misleading. To overcome these problems, the following data gathering and testing guidelines are suggested:
- An initial research phase is required to provide adequate background, upon which to determine the testing program, and against which the results may be interpreted.
- Data related to nearby metallic structures, as well as the geological, geographical and meteorological nature of the area is very useful. For instance the geological data regarding strata types and thicknesses will give an indication of the water retention properties of the upper layers and also the variation in resistivity to be expected due to water content.
- By matching new rainfall data with seasonal average, minimum and maximum for the location it can be determined whether the results are accurate or not.
- Test Method Factors such as maximum probe depths, lengths of cables required, efficiency of the measuring technique, cost and ease of interpretation of the data need to be considered, when selecting the test type.
Note: Temperature and moisture content both become more stable as distance below the surface of the earth increases. So, to be operative through the entire year, a grounding system should be fixed as deep as possible.
Following are the steps usually performed during soil resistivity testing:
Test Method
Factors such as maximum probe depths, lengths of cables required, efficiency of the measuring technique, cost (determined by the time and the size of the survey crew) and ease of interpretation of the data need to be considered, when selecting the test type. Three common test types are
- Wenner Array: The Wenner array is the least efficient from an operational perspective. It requires the longest cable layout, largest electrode spreads and for large spacings one person per electrode is necessary to complete the survey in a reasonable time. As all 4 electrodes are shifted after every analysis, the Wenner Array is most vulnerable to lateral variations.
- Schlumberger Array: Manpower is hugely utilised with the Schlumberger array as for each move of the inner electrodes, the outer electrodes are moved four or five times. The decrease in the number of electrode shifts also decreases the consequence of lateral variation on end outcomes. Considerable time saving can be achieved by using the reciprocity theorem with the Schlumberger array when contact resistance is a problem.
- Driven Rod Method: The driven rod method (or Three Pin or Fall-of-Potential Method) is normally suitable for use in circumstances such as transmission line structure earths, or areas of difficult terrain, because of: the shallow penetration that can be achieved in practical situations, the very localised measurement area, and the inaccuracies encountered in two layer soil conditions.
Traverse Locations.
Soil resistivity can differ considerably both from 1 location to another and depth at a site, and single soil resistivity quantity is generally insufficient. To get an improved image of soil resistivity difference, it is sensible to perform a thorough survey. A Line Traverse survey is inexpensive and easy to find differences in soil resistivity at a location and can give considerable money savings, in terms of labour and material, when trying to obtain the necessary resistance value.
Spacing Range.
The limit of spacing determined involves précises close probe spacings i.e. less than 1m, which are necessary to find out the upper layer resistivity, utilised in quantifying the touch and step voltages. Bigger spacings are utilised in quantification of grid impedance and remote voltage gradients. Calculations at huge spacings usually provide significant problems and they are vital if the bottom layer is of bigger resistivity, i.e. ρ2 > ρ1. In such cases considerable error is introduced if a realistic value of ρ2 is not measured due to insufficient spacing.
Practical Testing Recommendations.
- It has been found that special care is required when testing to:
- Eliminate mutual coupling or interference due to leads parallel to power lines.
- Ensure the instrumentation and set up is adequate
- Undertake operational checks for accuracy
- Reduce contact resistance
- Instruct staff to use finer test spacing in areas showing sharp changes
- Plot test results immediately during testing to identify such problem areas
How is Soil Resistivity Testing Performed?
This test requires the user to place four equally spaced auxiliary probes into the earth to determine the actual soil resistance, traditionally in ohms-cm or ohm-m. This test must take place around the entire area to determine the soil value at all locations. This test is done at different spacing, 5 to 40 feet, to determine the resistance value at various depths. This knowledge will aid in the design and implementation of the correct ground system to meet the particular site requirements. Following are the steps done in measuring soil resistivity:
- 4 test rods are evenly placed apart in a straight line and are hammered into the ground to be reviewed to a deepness of not greater than one by twentieth of the distance between the neighbouring rods.
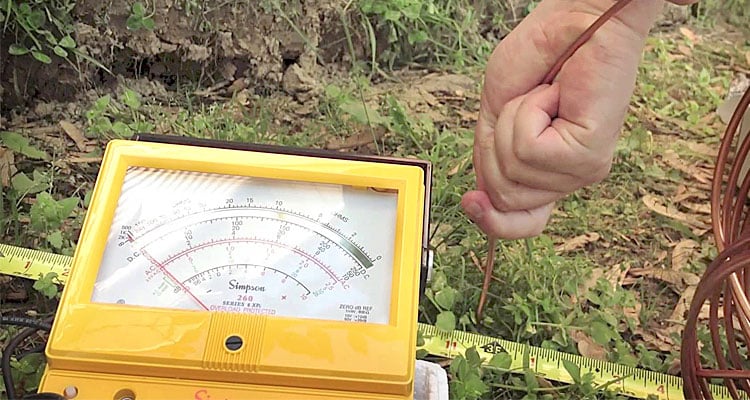
- An earth resistance tester is connected to these four stakes.
- The DC test option on the tester is then selected and performed, and the resistance figure R recorded.
- The soil resistivity level r in ohms/cm is then found out using the formula:
- r = 2 ρaR
- where: R = the resistance figure (in ohms), a = the separation of the test stakes, in metres.